

I considered buying some giant fake pumpkins that I could use over and over again every Halloween, but when I went to buy them they were hundreds, and not really that big. So I decided to make them!

I started out with cutting down 2 inch insulation foam into 2 ft by 2 ft squares. Then I glued them together using Hot Wire Foam Factory adhesive, though a friend tole me that liquid nails can work just as good!

I used a hot knife I bought off Amazon for $30 to shape it into a rough pumpkin shape after the layers had dried.
Once I had the rough shape, I took some metal wood shaving tools (once again, thank you Amazon), which worked great for further shaping. Sandpaper also helped smooth things out.
Then I used an exterior foam coat from Hot Wire Foam Factory that is kind of like a mix between plaster and cement. I coated the entire surface of the pumpkin.
What I love about the foam coat: it dries rock hard, and has good weight. There was no way this would blow off my porch
What I didn’t love about the foam coat: the weight could be a down side to some, and it does have a very stony look to it.
While it was still a little wet I used sandpaper to smooth it out as best I could. This was all done before I made the stem.
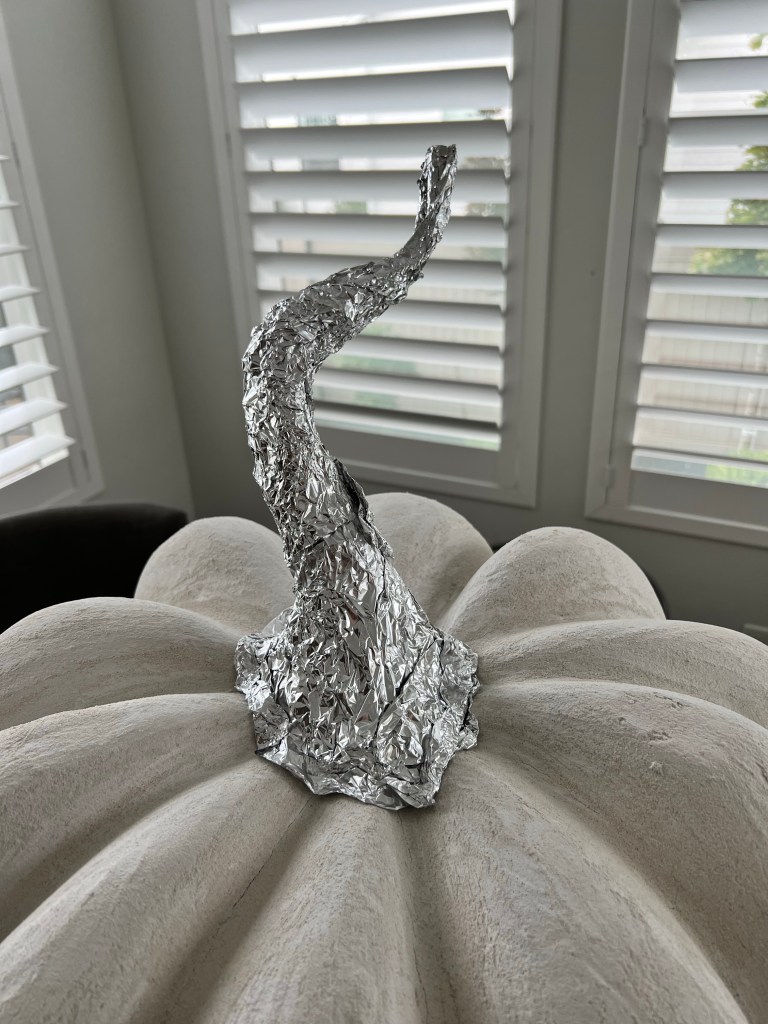
I wanted to stem to be sturdy, so I took an old roller shade (a cheap one from Walmart that I had, and hammered down half to get the rough shape that I wanted.

Then I attached the stem with a lot of liquid nails, and covered it in tin foil to give it more of the shape I wanted. I covered it in duct taped after that.
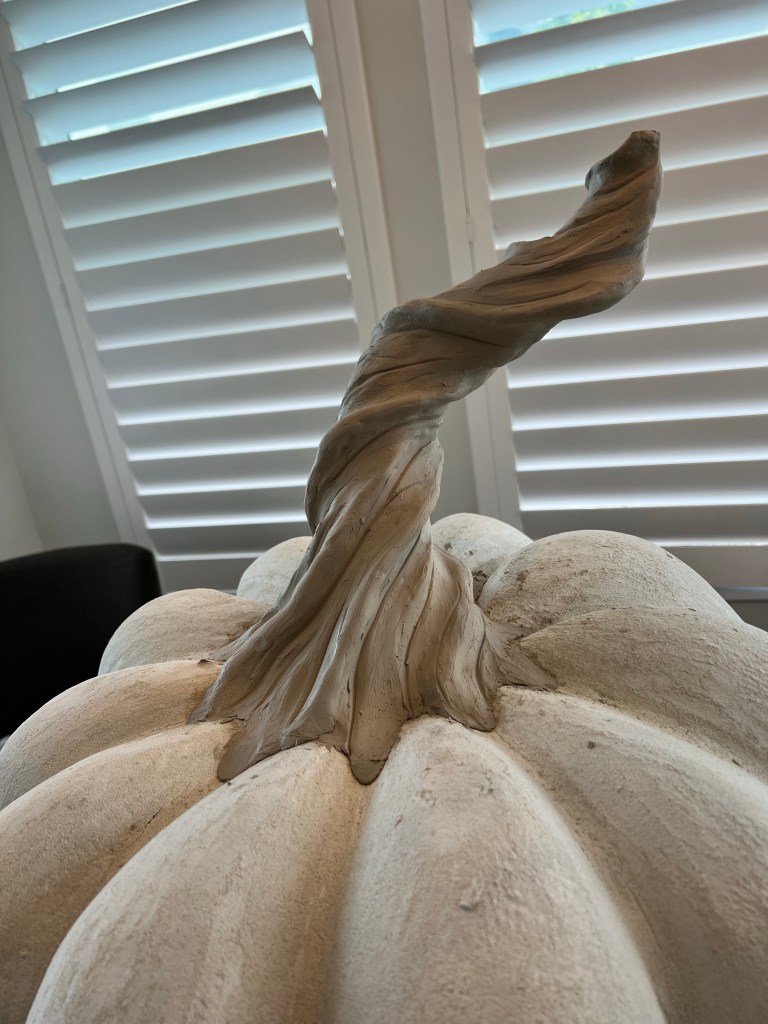
After getting the base I tried two different options for the stem.
I did one with air dry crafting clay and one with air dry crafting foam.
Here is the one with the air dry clay. It was fun to add the detail!
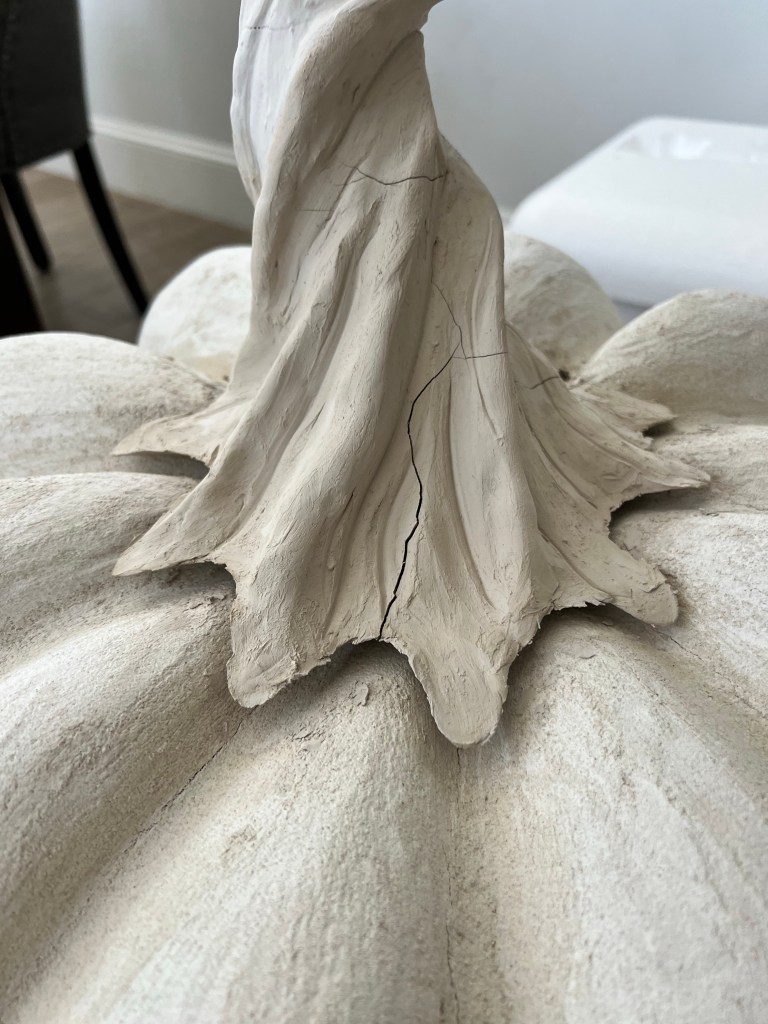
The down side was that the clay cracked and shrunk, leaving a gap between the stem and the pumpkin (that wasn’t there when I molded it!).
It was okay because I ended up covering the entire pumpkin, and the stem, with calk. I got the cheap stuff from the Dollar Tree.
I did this because I wanted it to look more smooth and I didn’t love the stony look of the exterior foam coat.
NOTE: on my first one I made the mistake of putting the calk on the bottom of the pumpkin and it was a little sticky and peeled off of the bottom of the pumpkin, so I ended up re-applying a foam coat layer to the bottom after peeling it off.
On the left is the pumpkin after applying the calk layer and correcting the gap.
The one on the right is after just the rough cut, before doing all of the smoothing/shaping.

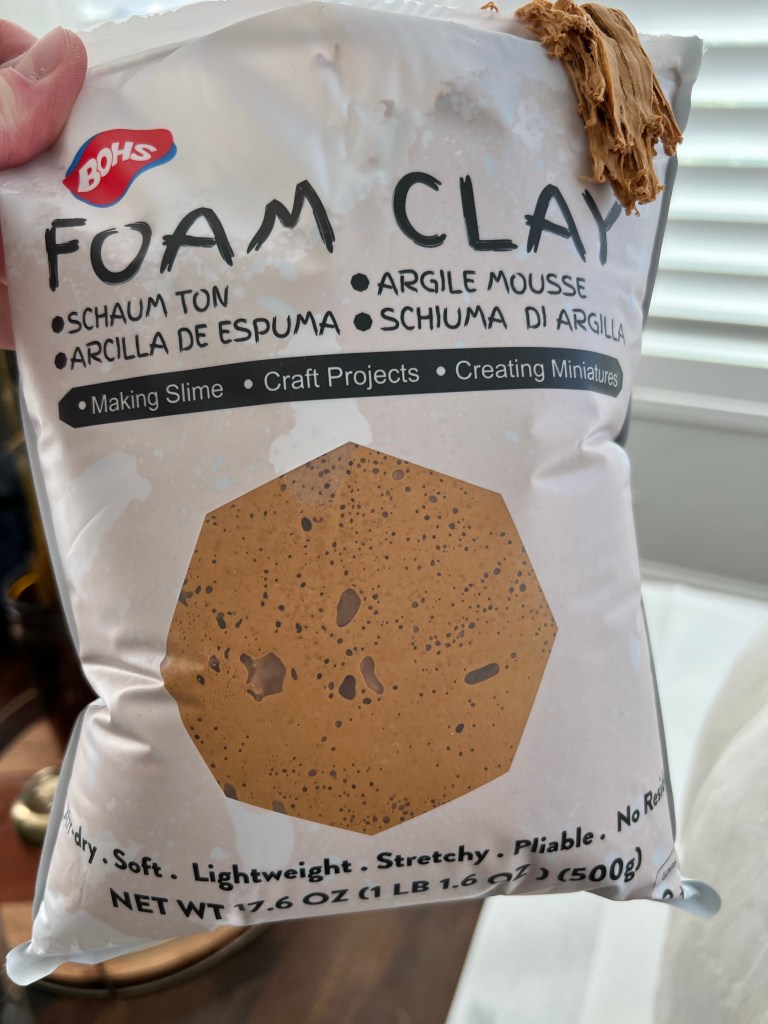
For the other stem I used this foam clay:
The end result was pretty similar.

I got 3 different colors of spray paint for the paint.
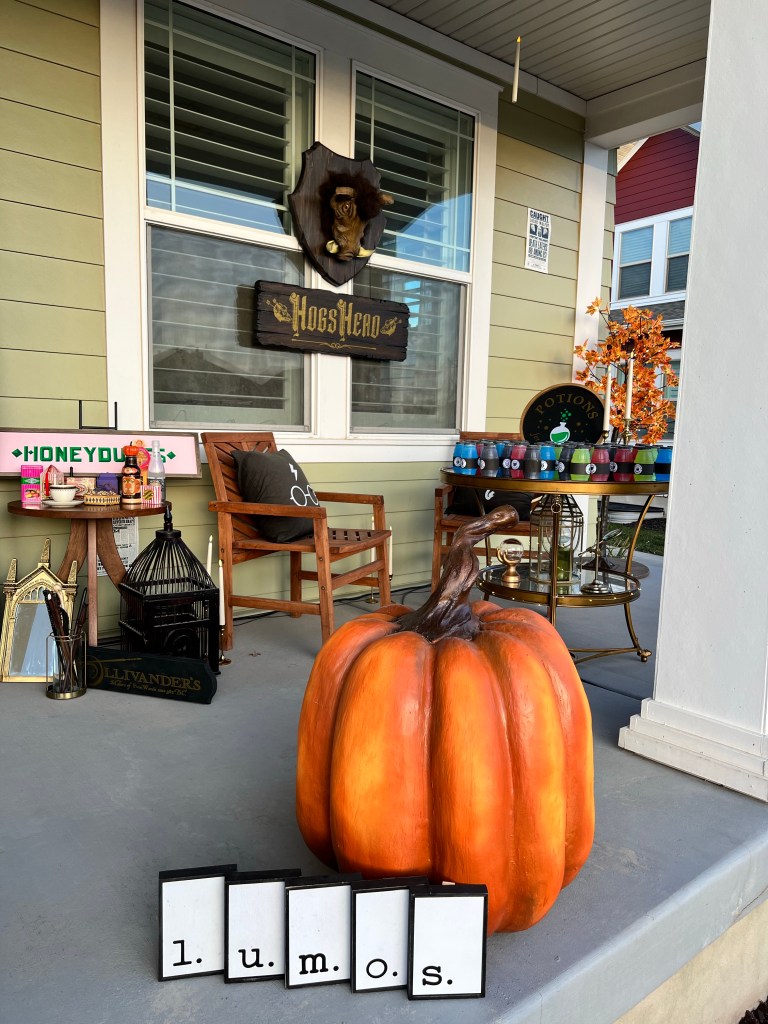
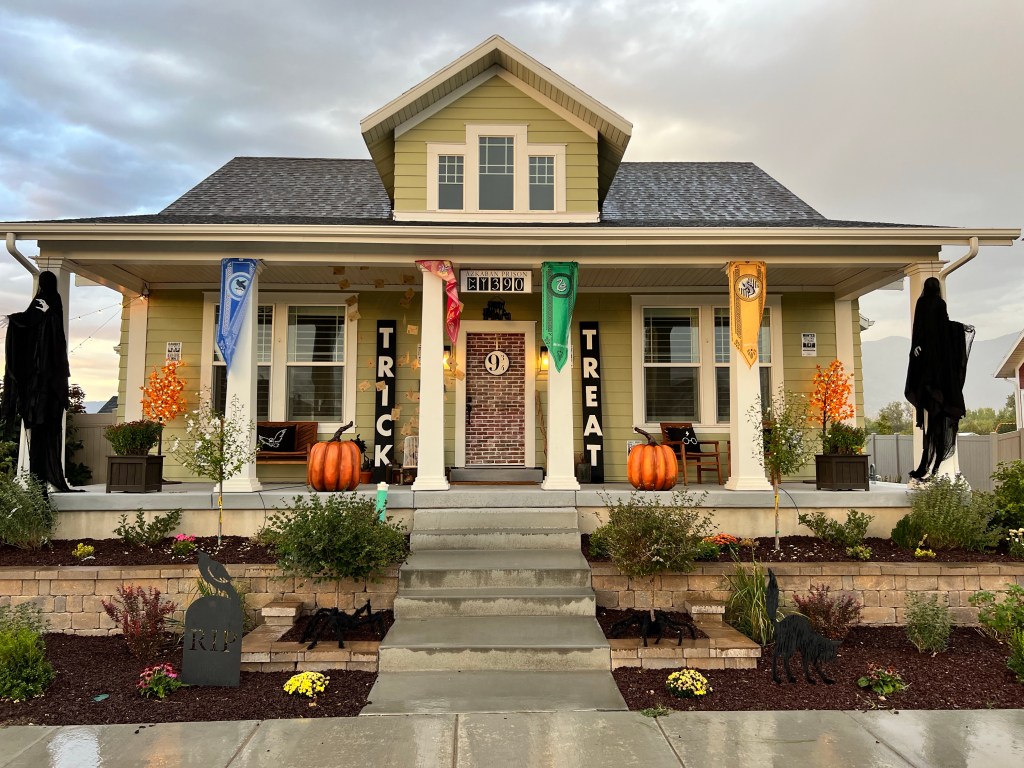
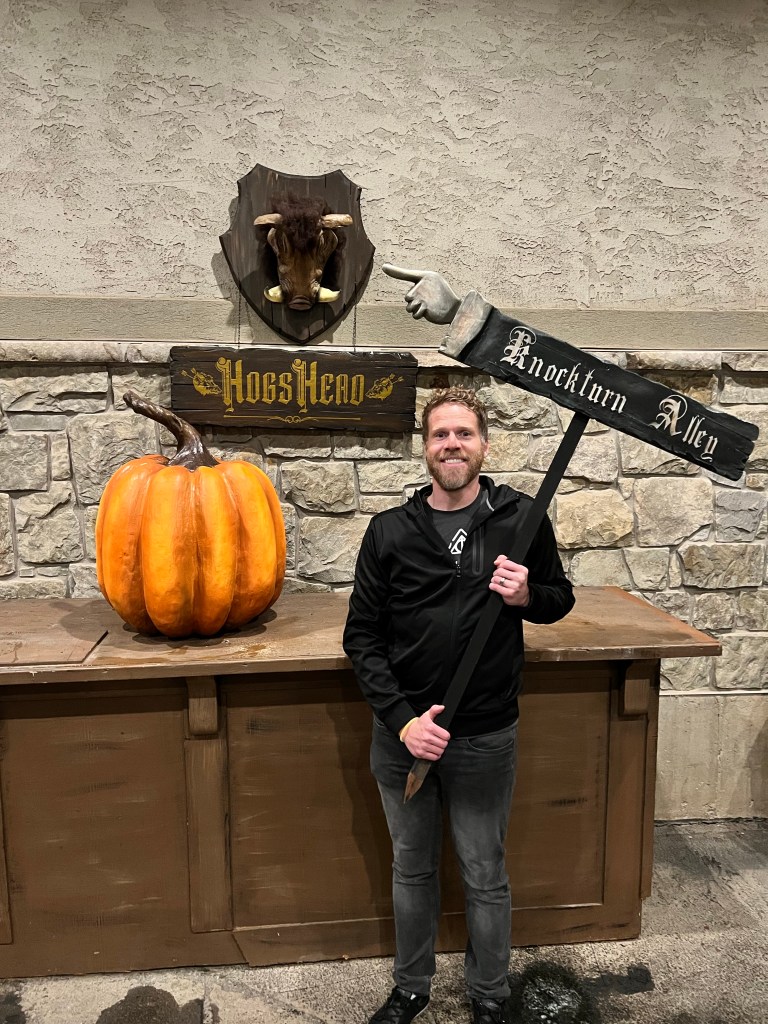
Some final picks – turned out great. Much bigger and ultimately cheaper than anything I found at any store!


I love these and am going to have a go at making them. Thank you for sharing. Denise in the UK
LikeLiked by 1 person
The pumpkins were amazing. I am going to have to make one for our front door this fall!!
Thank you for sharing. Canada
LikeLiked by 1 person
Your directions and videos were so helpful and greatly appreciated. The pumpkins are fantastic! Thank you for sharing!!
LikeLiked by 1 person
Glad it was helpful!!
LikeLike
Wow! You did an amazing job! Super creative!
LikeLike
Thank you!
LikeLike
I wish you sold these ! With two babies at home, I won’t be able to get back to the crafts for a few years. You did a fantastic job.
LikeLiked by 1 person
Thank you!!!
LikeLike
could you place the link to which metal carving tools you used? I can’t get a clear look of them and Amazon isn’t much help. Lol
LikeLike
Amazon Basics File Set with Carry… https://www.amazon.com/dp/B08FB8NR2K?ref=ppx_pop_mob_ap_share
LikeLike
Could you share think link to the metal carving tools you used please?
LikeLike
Amazon Basics File Set with Carry… https://www.amazon.com/dp/B08FB8NR2K?ref=ppx_pop_mob_ap_share
LikeLike
thanks for sharing
great job
LikeLiked by 1 person
Wow, your giant pumpkin is incredible! You can use these two pumpkins again this halloween.
I’m from BOHS store , glad that you use our foam clay, I want ask for your permission to use your photo on our product page, I can put blog name on the photo, is that ok ?
LikeLike
Of course! I’ve used it for other projects as well. Those pumpkins have been outside for the month of October the past 3 years and they are still holding up!!
LikeLike
I know you said you used caulk to cover it the second time, but I’m curious how many tubes you used for just 1 pumpkin? And how you went about covering it with the caulk? Like did ypu use your hand to smooth it out or..?
LikeLike
I can’t remember the number, but I’d guess it was 10 or so. Dollar Tree is the best value.
I used disposable gloves and we down my gloves hands to smooth it out.
LikeLike